This is a sponsored post.
I love adding in quirky little touches to my home whenever I decorate. A couple of weeks ago I removed our mirror gallery wall from our dining room (I did like it, but really felt it wasn't giving me enough flexibility with decorating the space. And, if you know me, I'm in a constant state of moving things around and changing things up.)
Anyway, I added molding and painted the wall part white to match our trim to give the entire space more definition.
I have it really simply decorated right now...just a pile of white pumpkins, a plant, books and candles. All kind of moody, with hints of fall. I love using black in later autumn, because it does seem like a darker time of the year; it's cold, the trees are bare and daylight is short.

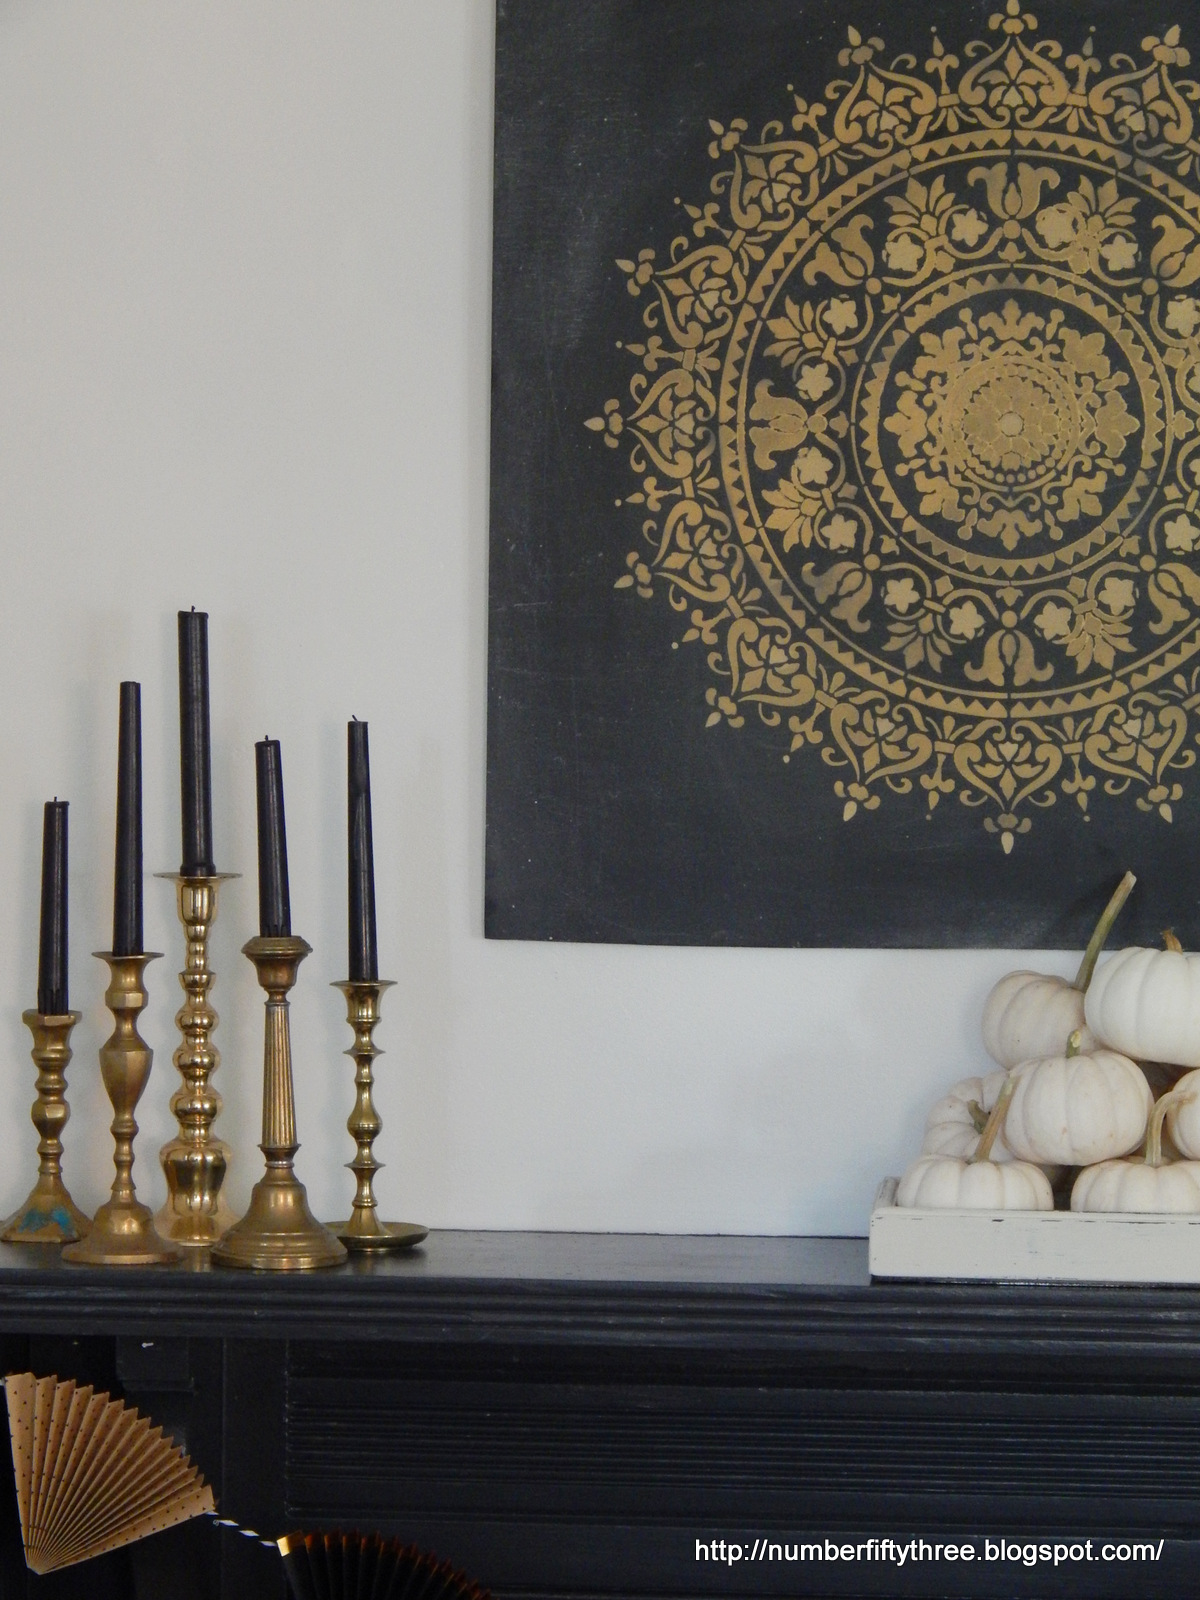

I wanted something in a larger scale to hang above the mantel that would blend in with how I already have the space styled and I really feel like my artwork does just that.

This was truly easy, and inexpensive...because you all know, large artwork can get very pricey!
First, I cut a piece of 1/2 inch plywood to size (mine is a 29 inch square). I sanded it until very smooth using 150 grit paper and then painted it with several coats of chalkboard paint. I let that thoroughly dry and seasoned as per the directions on the packaging. (I picked this wood because I liked how thick it was and the overall dimension meant I didn't need to piece it together.)

Then, I positioned my 24" Prosperity Mandala Stencil, provided to me by Cutting Edge Stencils, making sure there was an even amount of space on all four sides. I kept it from moving by lightly adhering it painter's tape.
Based on the size and type of this stencil, I felt that the foam roller was the best tool to apply my paint. I used regular, gold, metallic paint from the craft store. (You might notice a variation in the paint. That's because after I rolled on my the initial coat of paint, I used a small stenciling brush to highlight some of the details with another brand of paint. I love how it blends, but has added interest.)

Tip: Less paint is truly more when stenciling. Also, don't press overly hard! Following these simply rules really lessons bleed through.

Once, I finished stenciling I immediately removed my stencil and let the gold paint dry.
Lastly, I sanded the mandala with 320 grit paper and then seasoned the entire piece again with chalk and wiped it off with a clean cloth. I very simply hung it using a couple of D rings and some twine.


I'm really, really happy with my artwork and have a great feeling that even when I start moving things around for Christmas it will have a very strong presence somewhere in our home!

If you liked my DIY Boho Mandala Stenciled Artwork you may also like...
 |
| Stenciled Arrow Pillow |
 |
| Farmhouse Stairway Makeover |
 |
|
|


No comments:
Post a Comment
Thank you so much for stopping by Number Fifty-Three! I look forward to your comments.